As your website database grows, errors may occur from time to time. Fortunately, tools are available to quickly check and repair database tables. In this guide, we’ll walk through the steps required to verify and fix database tables using the popular phpMyAdmin tool.
How to repair MySQL databases and tables with phpMyAdmin
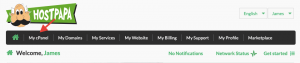
1) Log in to your HostPapa Dashboard.

2) Click on My cPanel or My WordPress.
3) Scroll down to the Databases section of the cPanel menu and select phpMyAdmin.

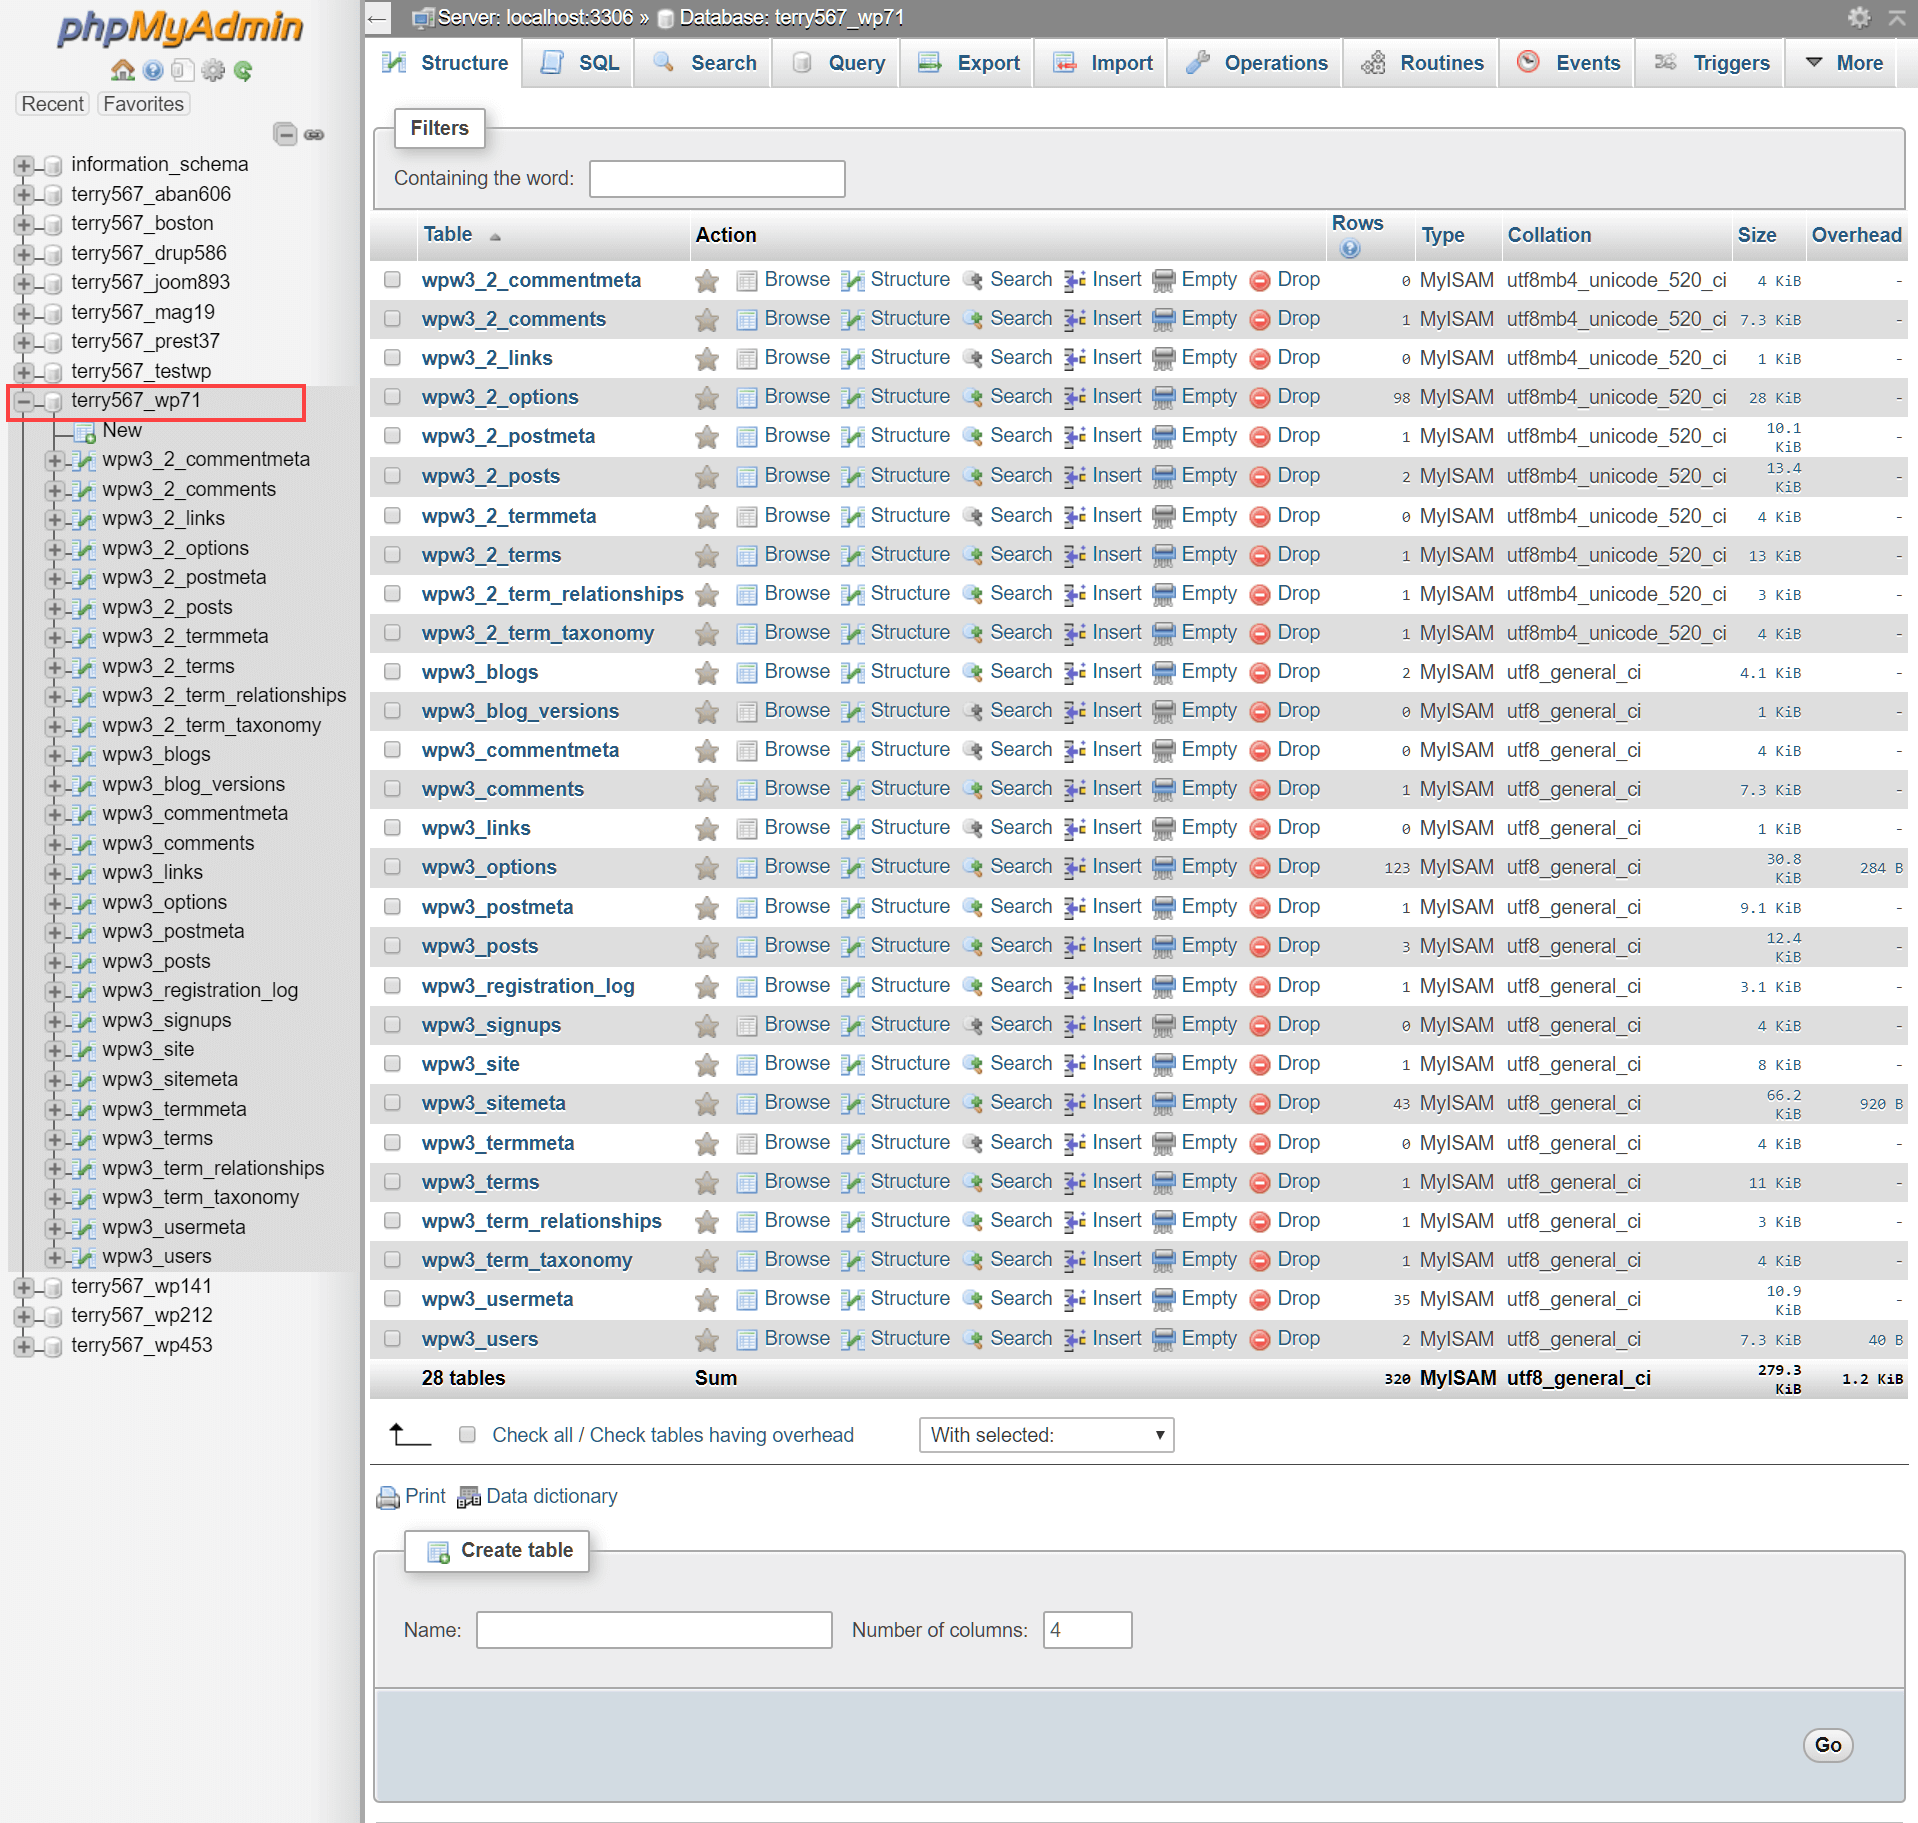
4) In the left sidebar, click the name of the database that you want to check.
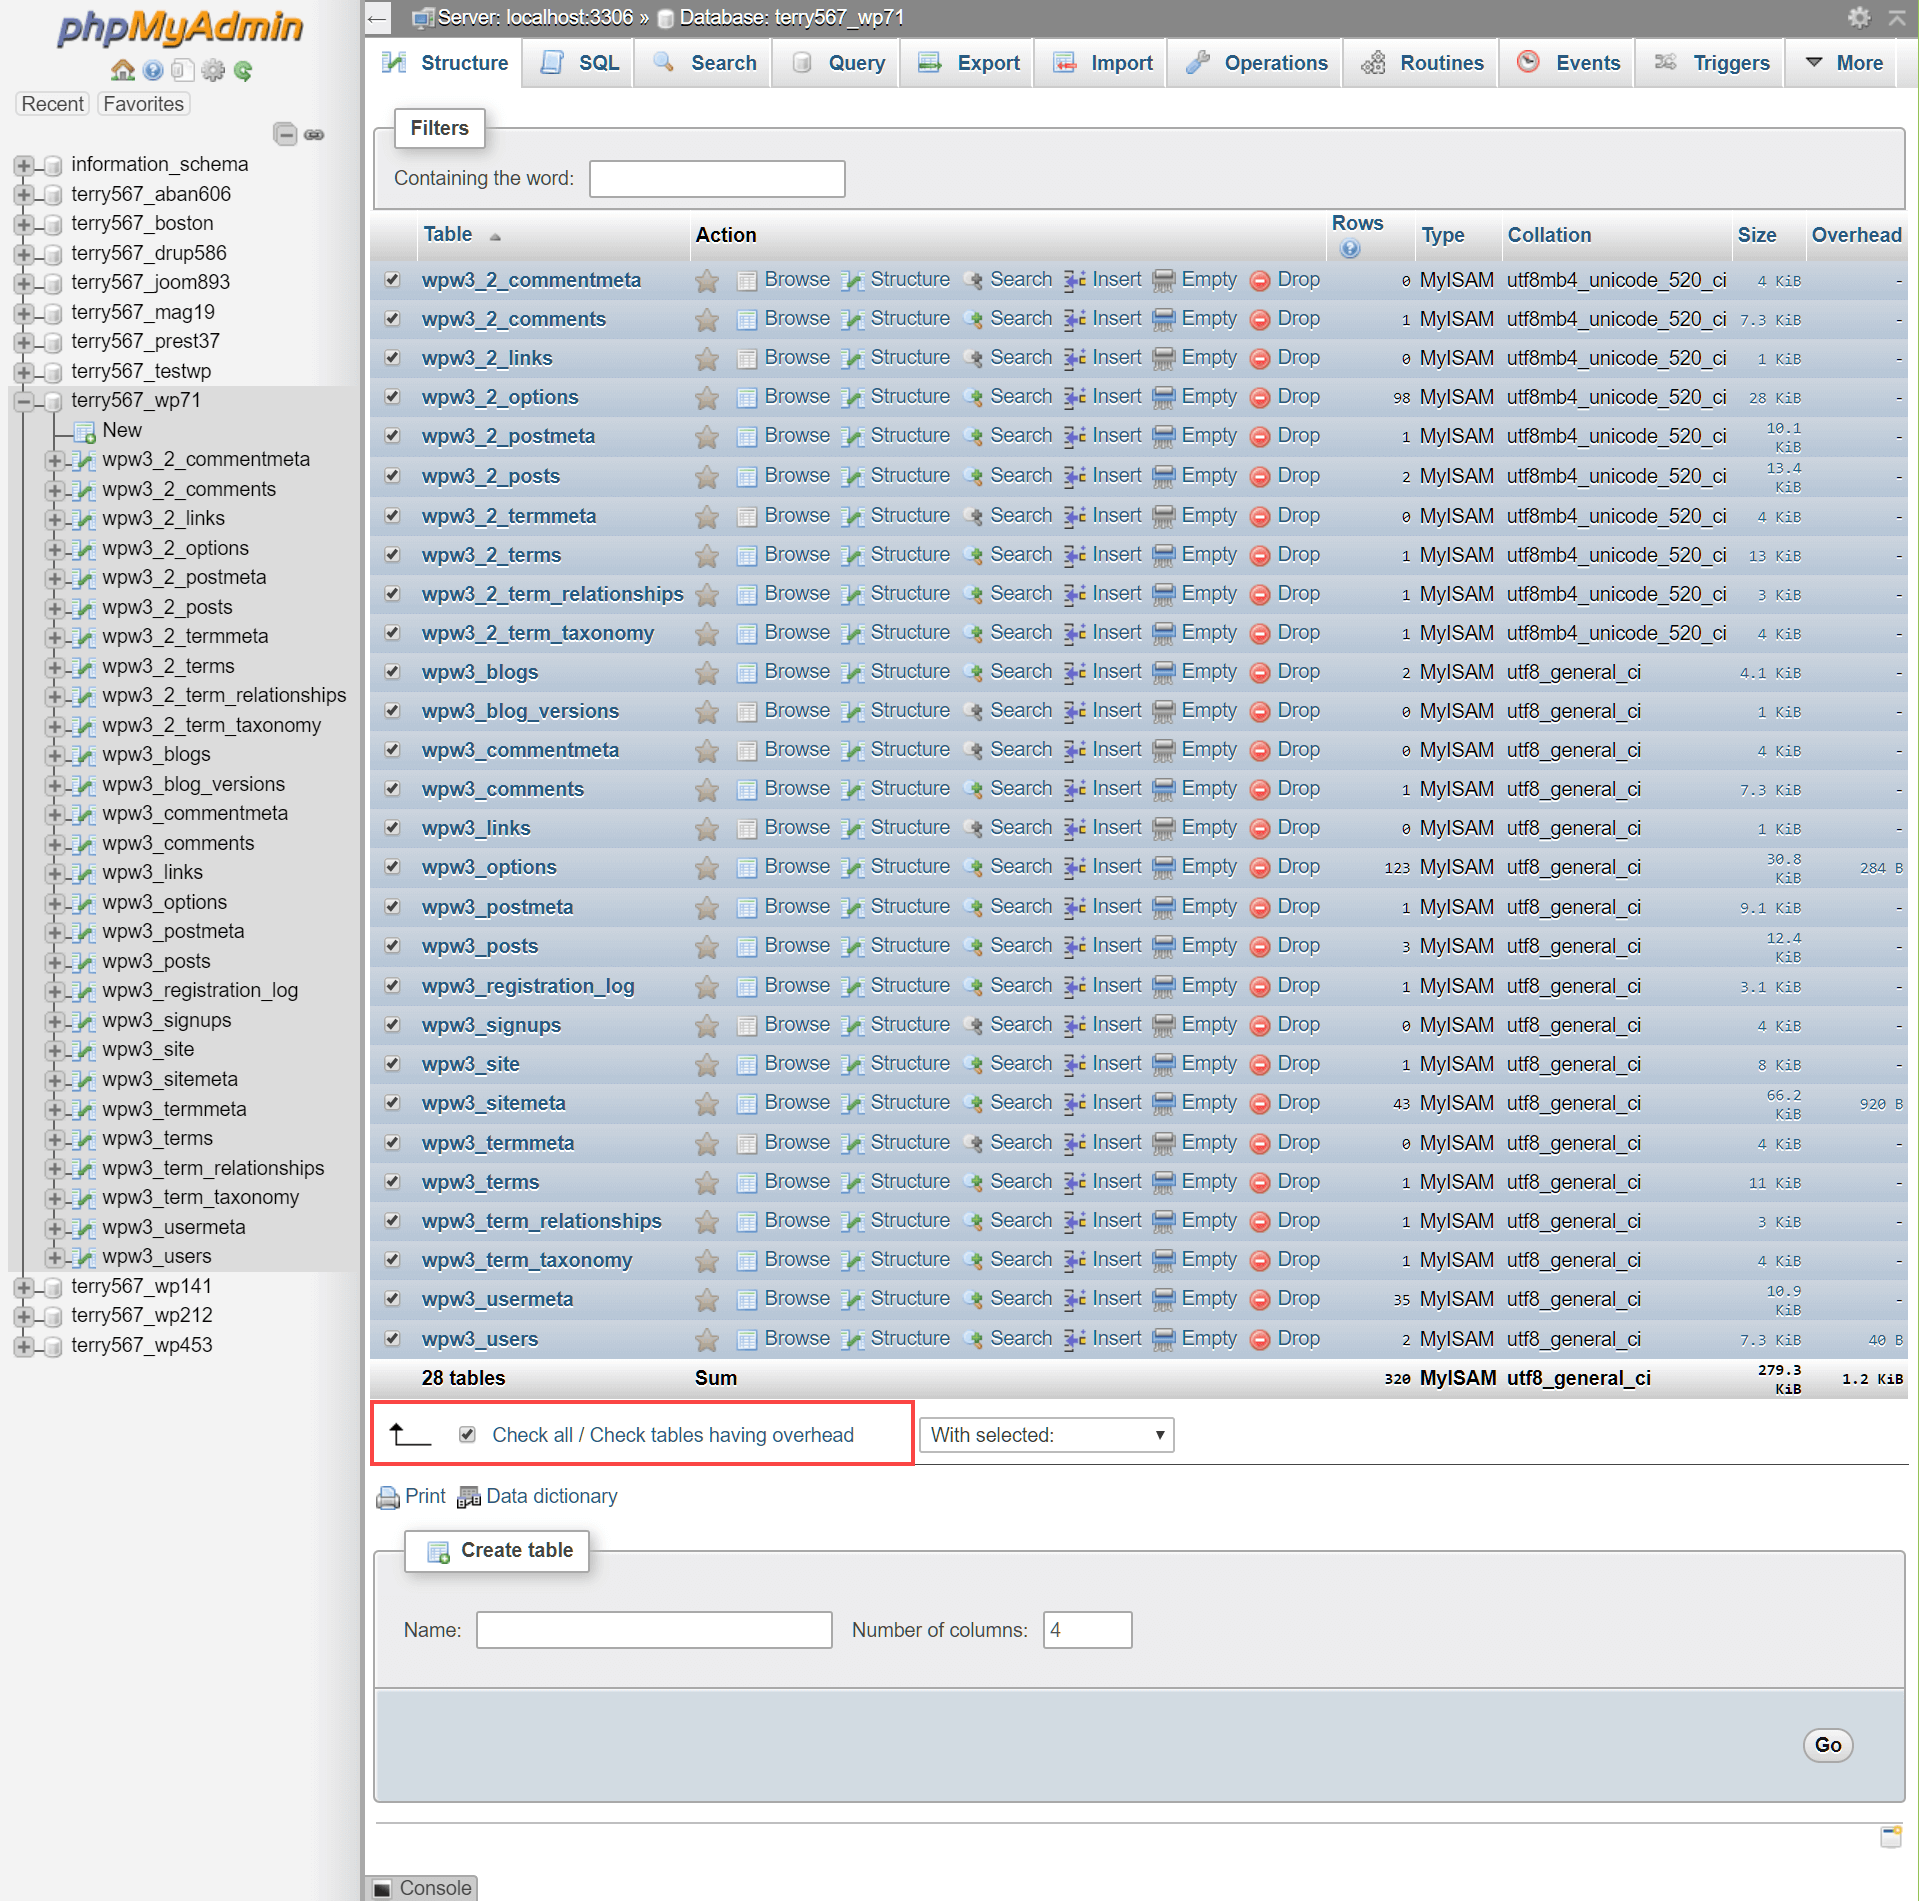
5) Now head to the right pane and check the boxes next to the database tables you wish to inspect. Use the Check all option at the bottom of the list if needed.
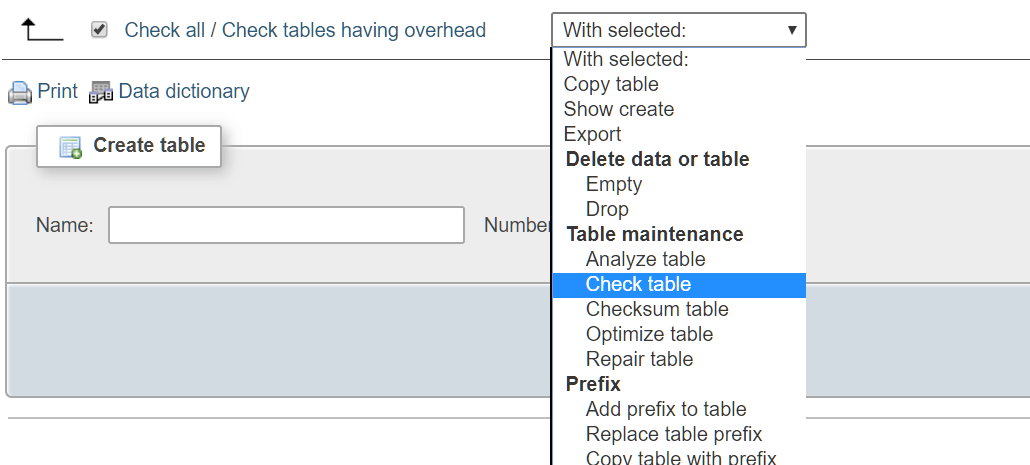
6) Click the arrow next to the With selected dropdown menu and select Check table.
7) Any errors found will be reported on screen. If necessary, highlight tables with errors and use the Repair table option in the With selected dropdown menu to fix any issues.
If you need help with your HostPapa account, please open a support ticket from your dashboard.
