This article describes how to install Akeeba Backup for Joomla! There are two methods for installing Akeeba Backup – install from URL and Upload and Install. If you are installing the Core edition of Akeeba Backup, you must use the Upload and Install method.
For more information about Akeeba Backup, see What is Akeeba Backup for Joomla!.
Installing from URL
Note: This method only works with the Professional edition of Akeeba Backup. If you are installing the Core edition, use the Upload and Install method.
Open the Akeeba Backup download page in your web browser. If you’re not already logged in to the Akeeba website, log in now. Click All Files next to the edition you want to install. Find the Direct Install Link for the Professional edition. Right-click Direct Install Link and select Copy Link or the correct copy option for your web browser.
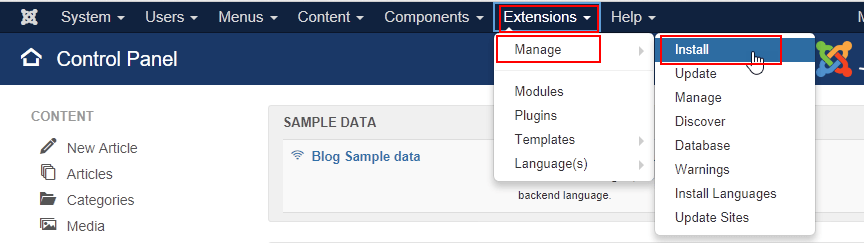
Log in to your Joomla! administrator back-end and go to Extensions > Manage > Install.
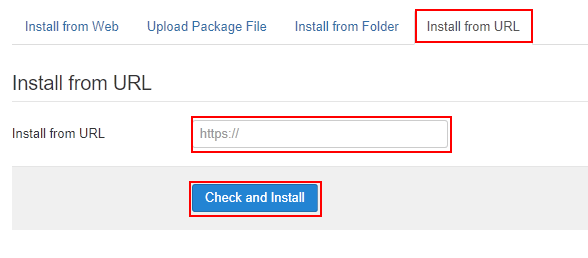
On the Install from URL tab, paste the Direct Install Link you copied from the Akeeba Backup download page. Click Check and Install.
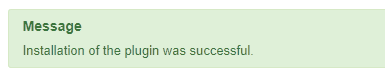
When installation is finished, you’ll see a message that the installation was successful.
Installing with the Upload and Install method
Open the Akeeba Backup download page in your web browser. If you’re downloading the Professional edition and are not already logged in to the Akeeba website, log in now. Click Take me to the downloads for this version next to the Akeeba Backup version you want to install. Download the compressed (.zip) installation file for the Professional or Core edition.
Log in to your Joomla! administrator back-end and go to Extensions > Manage > Install.
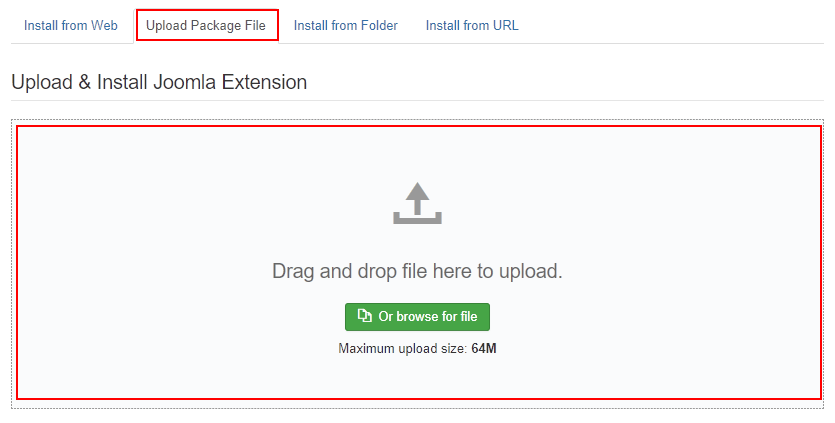
On the Upload Package File tab, drag the compressed (.zip) installation file you downloaded from the Akeeba Backup download page to the upload area. Akeeba Backup is automatically installed after the installation file is uploaded.
When installation is finished, you’ll see a message indicating the installation was successful.
Configuring Akeeba Backup
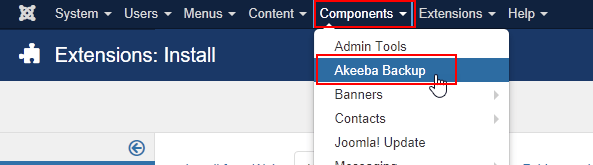
In the Joomla! administrator back-end, go to Components > Akeeba Backup.
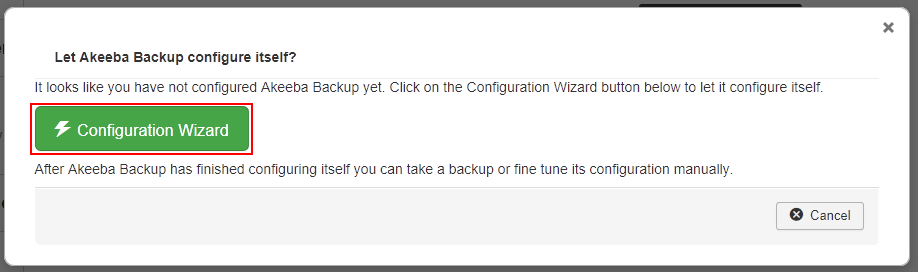
The first time you open Akeeba Backup, you’re asked if you want to allow it to configure itself. Click Configuration Wizard to continue with the automatic configuration.
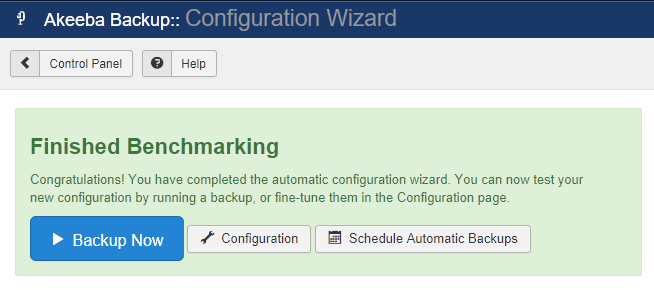
The Configuration Wizard completes a series of benchmarking and configuration tasks. When it’s finished, you can create your first backup, do additional configuration, or schedule automatic backups.
More information
For more information, see What is Akeeba Backup for Joomla! and What are Joomla! extensions, components, modules, and plugins in the HostPapa knowledge base.
If you have any questions or need help, you can always contact HostPapa Support by opening a support ticket. Details about how to open a support ticket are here.
